One of those “I’m just messing around” afternoons somehow turned into a mini-pie extravaganza when I remembered that jar of pumpkin purée hiding in the fridge. I thought, “Hey, why not make tiny pumpkin pies?” Less fuss, more fun, and no slicing required. Plus, mini muffin pans make everything look adorable. Before I knew it, I was rolling out pie dough in tiny circles, thinking, “Do I even own that many muffin pans?”—yes, yes I do. Let me tell you, these little pies are delightfully forgiving. Sure, one or two might collapse as they cool or leak a dribble of gooey filling, but that just means you get to lick up the spill—and isn’t that half the reason we bake? Spiced pumpkin filling baked inside a buttery, flaky crust, all in one bite-size package… it feels like a clever hack that somehow tastes luxe. One bite and defenses drop—this is fall, nostalgia, and baked-with-love all wrapped into one bite. And the best bit? You don’t have to blind-bake crusts or fidget with cooling racks. You just fill, bake, cool a bit, and pop them out of the pan. Okay maybe after about 24, I panicked they wouldn’t hold together, but trust me—they do, mostly. And the smell… imagine that classic pumpkin-pie scent but times tiny, times cozy, times “I just baked and wow that smells like sweater weather in my kitchen.”
Detailed Ingredients with measures
- 2 unbaked pie crust discs (homemade or store-bought)
- 1¼ cups pumpkin purée (about 285 g)
- ½ cup heavy cream (120 ml)
- ¼ cup whole milk (60 ml)
- 1 large egg
- ¼ teaspoon salt
- 1 teaspoon ground cinnamon
- 1 teaspoon pumpkin pie spice (store-bought or homemade)
- A small pinch of black pepper (optional, for depth)
Prep Time
About 2½ hours total—most of it is chilling time for the pie dough. The actual hands-on part? I’d say 40 minutes of rolling, cutting, filling, and sneaking dough scraps when you think no one’s looking.
Cook Time, Total Time, Yield
Cook Time: Around 25 minutes in a 375 °F (190 °C) oven, until the edges are lightly golden and the filling is just set. Total Time: Clock in at about 3 hours—includes chilling, baking, a tiny bit of panic wondering if they’ll hold, and the final glorious moment of popping them out. Yield: About 48–50 mini pies—great for sharing, or if you’re anything like me, letting a few “accidentally disappear.”
Detailed Directions and Instructions
Pie Dough & Filling Prep (yes, that early kitchen hustle)
You’ll want that pie dough chilling in the fridge for at least two hours—seriously, I once tried to skip it and ended up with dough that stretched like silly putty instead of shaping into mini shells. While that’s chilling, whisk together pumpkin purée, brown sugar, heavy cream, milk, an egg, salt, cinnamon, pumpkin pie spice, and a teeny pinch of black pepper. The pepper? It’s sneaky so nobody notices, but boy does it make each bite pop.
Roll & Cut the Mini Crusts (tiny crusts, big joy)
Once your dough is cold and ready, roll it out on a lightly floured surface into a circle that’s about a foot across. Use a 2½-inch cutter—or improvise with a ⅓-cup measuring cup—to cut out rounds. I always re-roll scraps a couple times to get as many little crusts as possible—there’s often a rogue one that gets rescued by cookie-eating hands.
Shape into Mini Muffin Pans (this part tests your patience)
Pop those rounds into mini muffin tins—grease them well, otherwise they’ll cling like clingy exes. Press each round into the bottom and up the sides gently. Work quickly because if that dough warms up, it tears. I’ve totally crushed one here and there, but they still taste amazing.
Fill & Bake (watch the pumpkin magic unfold)
Use a spoon to gently drop the cold filling into each crust, right up to the brim. My first time I over-filled a few and got mini pie volcanoes—cute, but messy. Bake in the oven until crust edges are golden and centers look almost set but still jiggle. These are faster to bake than their full-size cousins, so check around the 21-minute mark.
Cool & Release (the heartwarming moment)
After baking, give them about five minutes in the tin. If you greased well, they pop out easily—sweet little autumn stars. If not, coax them gently with a spoon. Let them cool fully before diving in or topping them.
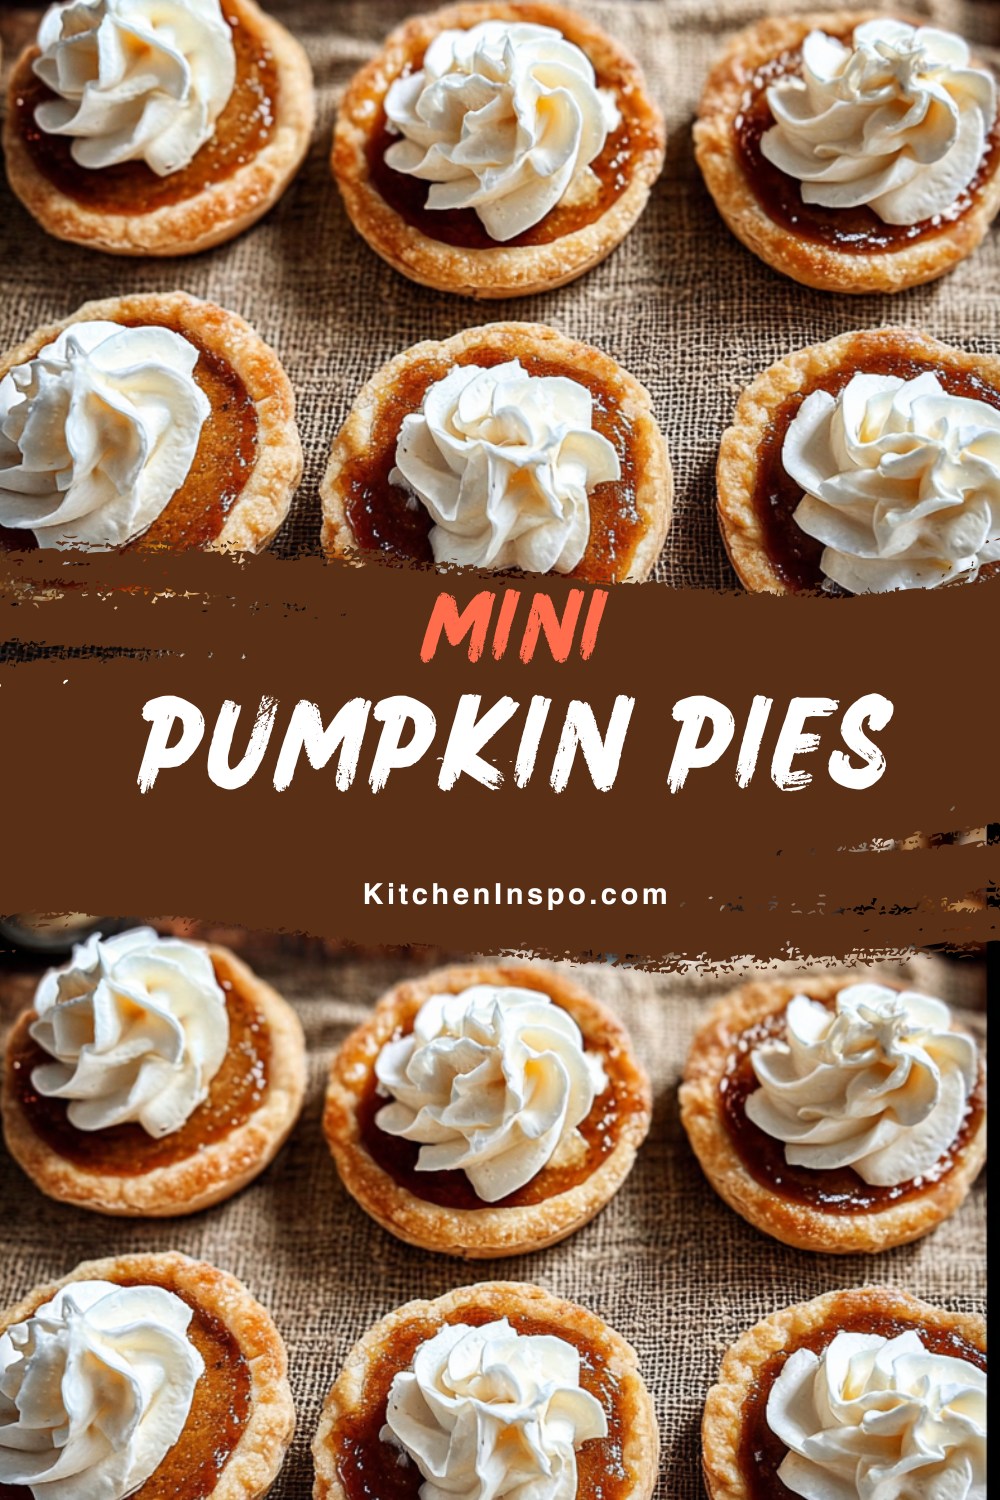
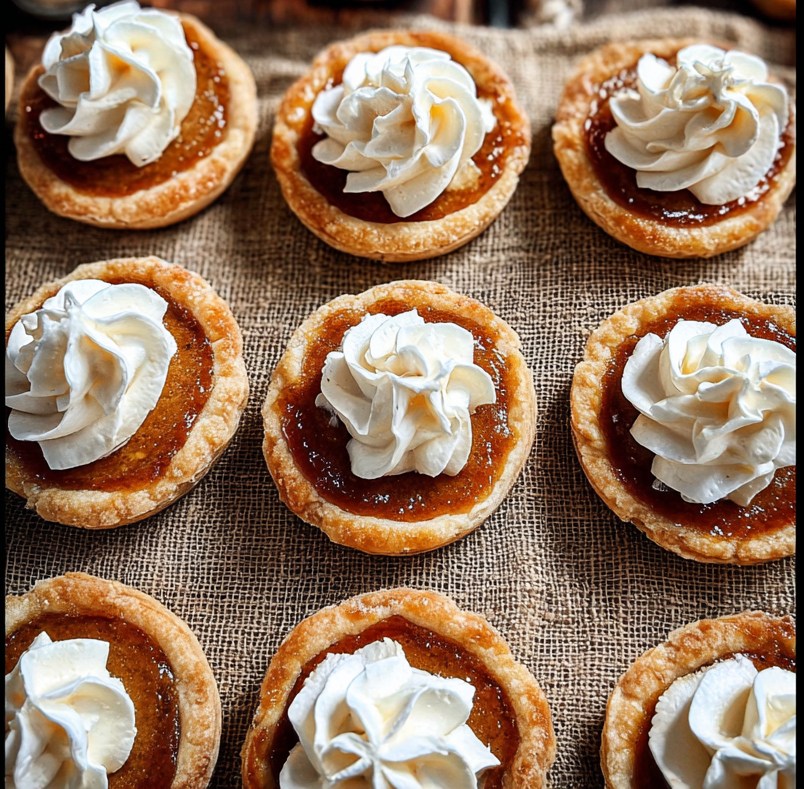
Top & Serve (whipped cream is mandatory, right?)
Once cooled, pile on a whimsical swirl of whipped cream. I sometimes do a fancy star, other times just scoop it on with my fingers—flour-smudged and proud. These are best at room temperature, but honestly? They’re just as good chilled.
Notes
Chill That Dough
Cold dough shapes like a dream. If it’s warm, it tears, and you’ll end up patching shells and grumbling, believe me.
Pepper Is the Secret
A tiny pinch of black pepper lifts the whole flavor. Nobody asks what it is, but you’ll get asked why your pumpkin pies are so good.
Make-Ahead Gold
You can prep crust and filling ahead: store chilled dough in the fridge for up to 5 days or freeze for a few months. Fill and bake when you need a cozy treat—instant fall magic.
Cook techniques
Chill your dough like it’s a secret weapon
I once tried making these without chilling the pie dough—big mistake. The crust was droopy and sad, not that cute little shell I was dreaming of. Now I prep the dough ahead, pop it in the fridge for at least two hours (or overnight when life’s hectic), and then roll and cut. That chill is what keeps those mini muffin cups proud and puffy—not flop-city.
Round shapes: whatever tool is handy
I’ve used cookie cutters, my 1/3-cup measure, even the rim of a glass to cut perfect dough rounds. No one judges. I just press each into the muffin cup, pushing dough gently up the sides until they’re snug. It’s a messy tender moment, but it works every time—even with floury fingerprints.
Don’t overfill—give them space to breathe
Oh yeah—one time I piled filling right to the edge. During baking, they puffed up and then sorta collapsed over the crust edges, looking like sad little pumpkin volcanoes. Now I fill each just to the rim (not over), and the top puffs, settles back in, and looks like a cozy pumpkin domed hat. Always better than a mess.
Let them rest before topping
I tried glazing or adding whipped cream while they were still hot (impatient me again), and… meltdown central. Now I let them sit in the pan for five minutes, then ease them out and cool them fully. Whip or glaze only when they’re cool enough to handle—it makes that topping stay right where it should.
FAQ
What if I forget to chill the dough?
You’ll get crusts that slump and melt into muffin cups instead of holding shape. It’s the chill that offers structure and keeps them cute—totally non-negotiable if you want mini pumpkin perfection.
Can I use store-bought pie crust?
Sure! It’s not as flaky or buttery as homemade, but it’ll still work—especially on those days when shortcuts are life-savers. Just treat it gently and avoid overheating it while rolling.
How full should the filling be?
To the rim, not over. It gives a little breathing room so the filling puffs and settles without spilling. Remember those sad volcano top examples? Yeah, overfill = sad.
How do I store or prep ahead?
Make the dough ahead and chill. You can make the filling a day ahead too. Baked pies keep in the fridge for up to five days. Want to freeze them? Cool completely, layer with parchment in a container, freeze up to three months. Thaw and warm before serving—they’re still adorable and delicious.
Conclusion
You’ve just tackled Sally’s Mini Pumpkin Pies—those adorable bite-sized wonders that pack all the autumnal charm of a full-size pumpkin pie without the fuss. Let me tell you, they’re perfect for when your craving hits but you’d rather skip the hour-long bake time and the cutting drama. I’ll admit, one time I rolled the dough too thin and the crusts split right when I pressed them into the pan—cue a tiny pastry graveyard in my muffin tin. But hey, a quick patch, a wink, and they were still total showstoppers. The filling is dreamy—rich with brown sugar, warm spices, and that cheeky hint of black pepper Sally recommends with confidence. It browns just right around the edges, yet stays delightfully wobbly in the center—like a crusty little pumpkin hug waiting for your first scoop. When I pulled the tray from the oven, steam curled up like a cozy exhale, and I may have (ahem) sampled one too many before they even cooled. And yes, there were telltale orange fingerprints on the counter, but that’s where the magic lives, right? Each mini pie is that perfect ratio of flaky crust to spiced custard—just the right forkful of nostalgia and surprise. They’re festive enough for guests, yet so simple that even a tired Tuesday makes them feel like a celebration. And that pinch of black pepper? It gives a sneaky depth I’d totally forgotten until the moment it flirts with your taste buds—suddenly each bite feels like something you might find in a little rustic bakery hidden behind falling leaves.
More recipes suggestions and combination
Pumpkin Pie Bars
Think of the same spiced filling plopped into a square pan with crust pressed into the bottom—less fuss, more snacking. I once forgot to grease the pan and almost broke the baking sheet trying to pry a bar free, but we all just dug in with forks and called it “rustic presentation.” Totally worth it.
Mini Pumpkin Cheesecake Pies
Use the mini crusts but swirl in a cream cheese layer before piping on the pumpkin mixture. My first swirl looked like a toddler’s art project, but each bite was this creamy, tangy surprise that made me swoon—and crumbs were everywhere, of course.
Pumpkin Hand Pies with Lattice Tops
Roll the dough thinner, fill, fold, then weave that lattice top over the filling and crimp the edges. Mine burst open mid-bake in a dramatic pumpkin jigsaw mess, but that caramelized filling hiding underneath made me forgive the chaos immediately. Serve the minis for sweet little indulgences, the bars for casual gatherings or lunchbox treats, cheesecake versions for a creamy twist, and hand pies when you want handheld nostalgic goodness. Expect your kitchen to gather flaky crumbs, stray filling drips, and maybe a rogue lattice strip—but what else is holiday baking if not cozy chaos?